Brazilian Beef Empadinhas
It's summertime, which means that it's time once again to indulge in Brazilian meat. Oh, get your mind out of the gutter, honey (or is that my mind...?); I'm talking about my friend Phillip's annual churrasco!
You may remember that last year, I strayed from the theme and made cupcakes for the occasion. Well, Phillip decided to put a nix on that this year and instead asked me to bring Brazilian empadinhas.
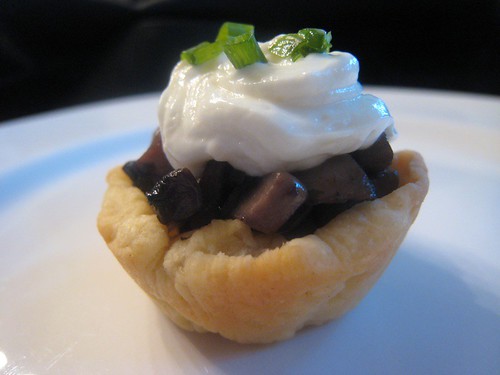
Empadinhas are similar to empanadas, except that the Brazilian version is akin to a meat pie as opposed to a half-moon turnover. According to Wikipedia, larger, entrée-sized versions are called empadas, whereas the appetizer-sized ones are called empadinhas. Since Phillip had the main course covered, I was tackling the latter.
I had never experienced the real thing and wasn't quite sure what I was going for, so I really wanted to start with a base recipe. I was surprised to find that nearly every recipe for meat empadinhas published online was in Portugese; just when I was trying to wrap my brain around how to convert deciliters to something I actually had the ability to measure, a Google scholar friend finally pointed me to this one from Blazing Hot Wok (thanks, P!).
I enlisted Chris' help, and we made a double-batch of the crust following Blazing Hot Wok's recipe exactly, except that our food processor was too small to handle it and we ended up mixing it by hand. For the filling, I had my heart set on beef, so I substituted ground beef, nixed the olives, and used beef broth rather than chicken. I went with the hearts of palm rather than the artichokes in the recipe, as I thought they would let the beefy flavor shine through a bit more.
All in all, I was very happy with the results, but since we didn't have official empadinha molds, we used mini muffin tins, which aren't really very well-suited for this process - mostly because they're so damn small. It was a *$#(@ putting the tops on the little pies and we ended up cutting the dough with biscuit cutters, then rolling each little circle out further by hand, which meant that both the dough and us were a little overworked. It took three hours for the two of us to make four dozen of these babies.
Were I to make these again, I'd make entrée-sized versions (which would be a cinch) or I'd thumb my nose at Brazilian tradition and make turnover-shaped ones. Tradition aside, I think they would be just as delicious.
The recipe, as adapted from Blazing Hot Wok:
Brazilian Beef Empadinhas
For the crust:
2 cups all-purpose flour
5 1/2 oz cold butter, cut into pieces
2 eggs, divided (1 whole egg + 1 yolk for crust and white for egg wash)
1/2 tsp baking powder
1/2 tsp salt
cold water, as needed
For the filling:
16 oz ground beef
3 garlic cloves, minced
1/3 cup finely chopped hearts of palm (fresh or in water, not marinated)
1/2 onion, finely chopped
2 T all-purpose flour
2 T tomato paste
about 1/2 cup to 1 cup beef broth
salt, to taste
Blazing Hot Wok suggests making this crust with a food processor. However, ours was too small, so we did it using a couple of butter knives.
Combine the dry ingredients with the butter and pulse until the butter is cut into the flour. Add one whole egg and the yolk of the other and pulse until they are incorporated. Pulse while adding enough cold water to just bring the dough together. Transfer to a clean surface and bring the dough together into a clump. If it's too sticky add a little more flour. If it's too dry, add a little more liquid, but do not knead it. Wrap the clump in plastic wrap and chill it in the fridge while you make the filling.
In a skillet, sautee the garlic and onions in olive oil until soft. Add the raw ground beef and sautee until it is cooked through. Add the hearts of palm and tomato paste. Mix well. Sprinkle the flour on top and stir to incorporate it. Add the broth slowly in increments. Mix well after each addition. Use just enough liquid to get a pasty filling. Heat through and season with salt.
To assemble the pies, roll out the dough to fit into the mini-pie pans so there is a little overhang. Since we were making mini-pies and I didn't want the crust to be too thick, we rolled ours out, cut it with 4" diameter biscuit cutters, then rolled each round out again a little further.

Filling the crusts. It is a LOT easier to put the tops on if the is a fair amount of excess dough on the bottom.
You'll also need a top (again, we used biscuit cutters for these, and just didn't roll them out as much afterwards). If necessary, sprinkle a little flour on the dough as needed to keep it from sticking. Use enough of the meat mixture to fill a little over the level of the mold. Place the top on and pinch the top and bottom crusts together. To keep the pies from popping open, roll the seam inward. Brush lightly with egg white and bake in 375F oven until golden, about 25 minutes. Serve warm or at room temperature.

Army o' meat pies
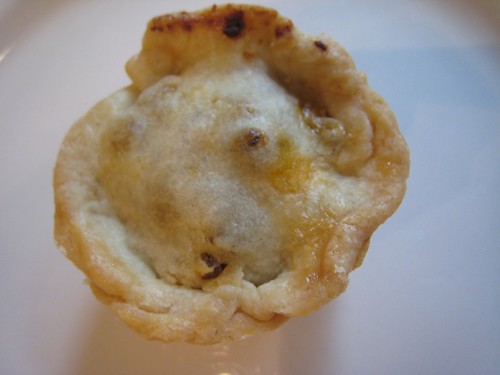
Uno

Yummy, meaty goodness!