Sunday, August 30, 2009

Hatch Chile Brownies with Grand Marnier Whipped Cream

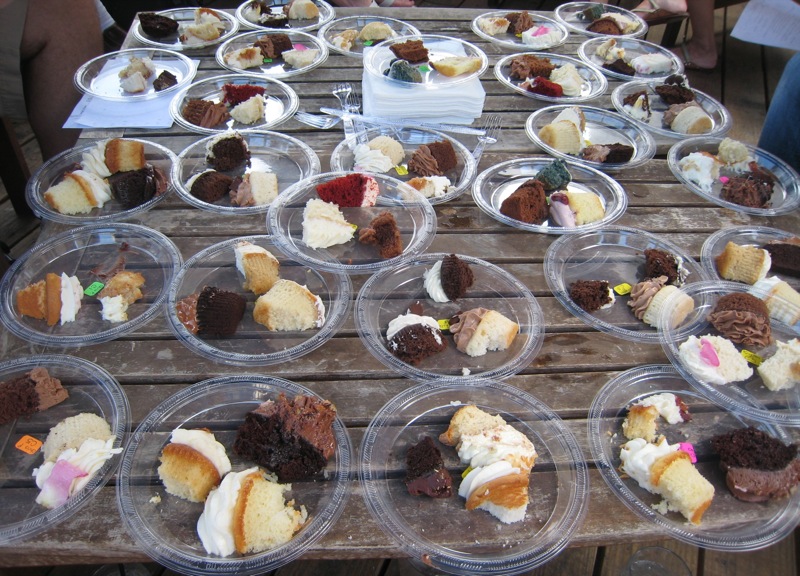
In another post, I blogged about the hatch chile-themed Austin food bloggers' potluck I attended. I brought these brownies and was very happy with the way they turned out - they are very moist and rich with a nice kick, but aren't overwhelmingly hot. Many thanks to Kendra Bartsch, Mia and Ken Burton, and Angela Woodbury for being my taste-testers for the trial run of these!

Hatch Chile Brownies (adapted from this recipe)

INGREDIENTS:
* 1 cup (2 sticks) unsalted butter
* 4 ounces unsweetened baking chocolate
* 1-3/4 cups sugar
* 3/4 cup flour
* 1/4 teaspoon salt
* 1/4 cup mild roasted hatch chiles, with skin and seeds removed, very finely chopped (2-3 medium to large chiles)
* 1 tablespoon + 2 teaspoons cinnamon
* 1 teaspoon vanilla
* 3 eggs
* 1-1/2 cups chopped walnut(s)

DIRECTIONS:

1. Heat the butter and chocolate in a microwaveable container on high for 1-2 minutes; stir until melted.

2. Mix the sugar, salt, flour, cinnamon in a large mixing bowl.

3. Add the chocolate/butter mixture, vanilla, and eggs. Then add the hatch chiles.

4. Mix well, then stir in the walnuts.

5. Spread the batter evenly in a well-greased 9" x 13" baking dish. Bake at 350° for about 25 minutes or until a toothpick inserted halfway between the edge and the center comes out clean.

I topped these with Grand Marnier whipped cream, which was made by whipping a pint of heavy whipping cream with 2 tablespoons of Grand Marnier, 1/8 cup of powdered sugar, and a teaspoon of vanilla, then garnished with 85% cacao dark chocolate shavings.


Hatch chile brownies with Grand Marnier whipped cream

Read more...

Food Bloggers' Potluck, Version Hatch Chile

I just returned from yet another glorious food bloggers' potluck. Man, do I ever love that group! As one blogger put it, "Somebody asked me if we were a group of foodies. I told them no, more like a group of food nerds." All right, then. Food nerds, unite!

The theme for this potluck was hatch chiles, a New Mexican chile that is rather ubiquitous for a couple of weeks around this time of year when they're in season. Many of the local restaurants feature hatch chile dishes, and grocery stores like Central Market have full-on hatch chile festivals and sell the already-roasted peppers by the bagful.


IMG_8328.JPG
A pile of beautiful roasted hatch chiles at Central Market.

When the gauntlet was thrown down to bring a hatch chile-themed dish, I'll admit I was a little skeptical. Would there be enough variety? Would the meal turn into spicy overload? Would there be enough dessert? Of course, I should have trusted the Food Bloggers' Brain Trust. Austin food bloggers collectively created a fantastic feast, incorporating hatch chiles in so many creative and delicious ways. Here are a few shots of the spread:

Muttabel Baba Ganoush with Hatch Chiles.jpg
Quite possibly the best baba ganoush I've ever tasted, and most certainly the most beautiful; the pomegranate seeds added a lot to the presentation. Made by Diann from Eat'n Veg'n

Hatch Chile Arancini.JPG
Rich and delicious hatch chile arancinis (hatch chile risotto with hatch chile jack cheese centers) made by Kristi Willis of Austin Farm To Table.

Tempura Fried Hatch Sushi.JPG
Seriously tasty sushi rolls - tempura fried hatch chiles with avocado and cucumber, topped by a homemade spicy garlic-chili-hatch-mango sauce. Made by the oh-so-talented Steven Noreyko.

Hatch Chile Hand Rolls.JPG
More sushi! Hand rolls made with garlic shoyu-seasoned tempeh, brown rice, avocado, cilantro, and roasted hatch chiles.*

Hatch Chile Sushi, v.2.JPG
Still more sushi; same ingredients as the hand rolls, above.*

Jabanero Ice Cubes for Hatch-Infused Vodka!
This is one of those "creative" applications I mentioned above. Vodka was infused with hatch chiles and then chilled with one of these ice cubes, which each had a jabanero pepper frozen into it.* HOT.

Bacon Wrapped Hatch Chiles.JPG
Bacon-wrapped hatch chiles.* Need I say more?

Chocolate Covered Peanut Brittle with Green Chile Salt.JPG
Chocolate-dipped pecan brittle with green chile salt, made by Lisa of Lisa Is Cooking.

Hatch Infused Truffles.JPG
Crazy crazy crazy good hatch chile-infused chocolate truffles, made by Michael and Tina of Cooking for Engineers fame!

IMG_8471.JPG
Guest appearance by the President of FFBA (Future Food Bloggers of America)!

Other wonderful hatch dishes included an amazing tri-color orzo with chiles, toasted pecans, and cilantro made by Cecilia of Soil to Supper; refreshing cucumber avocado gazpacho with roasted hatch chiles made by Teddy from Fun With Your Food; fantastic hatch chile chocolate sauce and homemade maraschino cherries over ice cream created by Jennie from MisoHungry Makes it with Moonshine; hatch chile mac 'n' cheese; hatch chile corn pudding and hatch chile cornbread; meatballs with hatch chile pesto sauce; hatch chile curry with basmati rice...the list goes on and on.

As for me, I brought hatch chile brownies with Grand Marnier whipped cream, which I'll blog about separately, since this post is getting pretty long.

It goes without saying that this potluck hotluck was a raging success. Thanks to everyone for keeping my belly happy and particularly Marshall Wright of Eat This Lens and his wife Kate for hosting the shindig! I hear that plans have already been - ahem - hatched - for a beer-themed potluck next time around. I'd better get to recipe testing...

(*If you made any of the dishes pictured above and weren't credited, please comment below with a link to your blog so I can credit you!)

Read more...

Tuesday, August 25, 2009

From 3 to 50 in Two Days

This past weekend, I attended two birthday parties. One of the birthday boys was turning 50. His party was catered and a fantastic live band, Mingo Fishtrap, provided the entertainment. Since the food was all being catered, there was nothing to bring but booze.


IMG_8312crop.jpg
Marsh, who really doesn't look a day over 49.

The other birthday boy was turning three. His party had a Mr. Potato Head theme (or, as he is wont to call him, "Tato.")

IMG_8339.JPG
Ian, sporting his favorite German hat...purchased from a garage sale, of course.

IMG_8343.JPG
Being a good and incredibly adorable host (he dropped this piece of cake on the ground about 30 seconds after this photo was taken).

IMG_8331.JPG
I really didn't photograph this well. It's a Mr. Potato Head made from a real potato, lying in a bed of insanely delicious homemade potato salad.

IMG_8360.JPG
Ian's brother, Craig, checking out the "Pin the Nose on the Mr. Potato Head" game.

Ian's mom asked me to bring fresh veggies and dip for the party. To borrow a phrase from my sister-in-law, it seemed like a Woman in Her Thirties (particularly a Woman in Her Thirties who's a food blogger) would make her own dip, so I did. I gotta say, it was pretty damn yummy.

French Onion Dip
French Onion, Baby.

I will never buy French Onion dip again, or make it from a packet. It was so easy, and the results were so much better than the old way. This dip is so creamy and rich that somebody asked me whether there were mushrooms in it (there aren't).

Here's the recipe - adapted (because I can't seem to leave a recipe alone, these days) from one on AllRecipes.

French Onion Dip

INGREDIENTS:

* 2 tablespoons olive oil
* 1 large yellow onion, chopped
* 1 stalk green onion, chopped
* 3 cloves garlic, minced
* 1 cup sour cream
* 1/2 cup mayonnaise (Real mayonnaise. None of that Miracle Whip stuff)
* 4 oz cream cheese, softened
* salt (to taste)
* Worcestershire sauce (to taste - I used just a few drops)

DIRECTIONS:

1. Heat the oil in a large skillet over medium heat; add the yellow onion. Cook and stir until the onions are caramelized to a nice golden brown. When the onions look like they are getting close, add the minced garlic and let it cook for a few minutes. Remove the onions and garlic from the heat and cool.

2. Mix together the sour cream, mayonnaise, and cream cheese. Stir in the onions and garlic when they are cool. Add salt and Worcestershire sauce to taste. Cover and refrigerate the dip for at least an hour before serving (longer would probably be better, but I was pressed for time and served mine about an hour after I made it, and it was still plenty flavorful). Immediately before serving, garnish with the green onion.

Read more...

Tuesday, August 18, 2009

Raspberry Sandwich Cookies With Lemon Cream Filling


Raspberry Sandwich Cookies with Lemon Cream Filling

OK, I'll be the first to admit that these cookies look kind of scary.

But they are goooooood - soft and chewy and sweet (but not too sweet) with just the right amount of tart. I got lots of compliments on them; perhaps the most convincing of which was that one of my neighbors was literally eating them two at a time - double-decker, double-decker cookies.

I stumbled upon the original idea for these cookies here (literally stumbled upon them, via StumbleUpon), but wanted to use a homemade sugar cookie base rather than pre-made refrigerated dough. When I was invited to a baby shower in the heat of the summer, it seemed like the perfect excuse to whip up a batch.

I started with this recipe for the sugar cookie base, but adapted it slightly.

I know it can be a little tricky combining various recipes (as evidenced by the fact that I forgot to buy Jello the first time I went to the store to get the ingredients), so I've compiled them here as I prepared them:

Raspberry Sandwich Cookies with Lemon Cream Filling

Cookies:
* 2 3/4 cups all-purpose flour
* 1 teaspoon baking soda
* 1/2 teaspoon salt
* 1-1/4 cups softened butter
* 2 cups white sugar
* 2 eggs
* 2 teaspoons vanilla extract
* 1/2 package raspberry Jello

Lemon Cream Filling:
* 5 cups powdered sugar + extra for sprinkling over the tops of the cookies afterward
* 2 sticks (1 cup) unsalted butter, well softened
* 1 teaspoon vanilla extract
* 1/4 teaspoon salt
* Zest of 1 small to medium lemon
* Juice of 1 small to medium lemon
* 2 Tablespoons milk, plus more if needed

DIRECTIONS:

1. Preheat oven to 350 degrees F. In a medium bowl, stir together the flour, Jello, baking soda, and salt; set aside.

2. In a large bowl, cream together the butter and 2 cups sugar until light and fluffy. Beat in the eggs one at a time, then the vanilla. Gradually stir in the dry ingredients until just blended.

3. Roll the dough into 1" sized balls (they will spread quite a bit) and place cookies 2 inches apart onto ungreased cookie sheets. The batter is pretty sticky; if it's too difficult to handle, chilling the batter in the refrigerator for a while helps immensely.

4. Bake for 8 to 10 minutes in the preheated oven. Be careful not to overcook them, as any browning will show in the color of the cookies. Allow cookies to cool on baking sheet for 5 minutes before removing to a wire rack to cool completely.

5. Mix all of the lemon cream filling ingredients together until fluffy. Add more milk if needed.

6. Pipe or spread the frosting mixture onto the underside of a cookie. Top with another cookie and repeat with the rest of the batch. Next, with a fine mesh strainer, sprinkle some of the reserved powdered sugar over the top of the cookies. Store in a covered container.

I think these are best at room temperature. If you refrigerate them, both the cookies and the cream filling get kind of hard, similar to the texture of an Oreo. They will soften up just fine if re-warmed to room temperature, though.

Read more...

Saturday, August 15, 2009

Ooo-Very Blueberry Pie

So if I come begging with take me back eyes
All you have to tell me
Are blueberry, blueberry pies.

- Prefab Sprout


We're right in the thick of blueberry season, and specials on the plump bits of juicy goodness abound (@$0.99 a pint at Central Market this week!). I'm perfectly pleased to pop these plain, but one of my co-workers loves blueberry pie, so I usually bake him a couple for his birthday every year (which, happily, is in August). I've tried a few different recipes, and this year I hit on one that I thought was by far the best. The mostly-uncooked bluberries in the pie lend it a much fresher blueberry taste. And it's super easy, too. Plop a scoop of natural vanilla bean ice cream on top, and it's a wonderful treat.


IMG_8265

Fresh Blueberry Pie (adapted from this recipe found on Allrecipes.com.

* 2 prepared pie crusts (I'm partial to the Pillsbury refrigerated ones)
* 2-1/2 pints fresh blueberries
* 1 tablespoon all-purpose flour
* 1 tablespoon butter
* 1 tablespoon lemon juice
* 1/3+ cup white sugar (original recipe called for 1/2 c; I used about 1/3 c + a couple of tablespoons for berries that were ripe and pretty sweet. You may want to adjust this depending on how tart your berries are or how sweet you like your pie.)
* 1/4 teaspoon vanilla extract
* 1/4 teaspoon almond extract
* 1/4 teaspoon cinnamon

1. Place one of the pie shells into a glass 9" pie plate. Flute the edges, prick holes all over the bottom and sides with a fork, gently cover the edges with foil so they don't burn, and bake it at 450 degrees for about 10 minutes or until it is about done. (Do not overcook it, as it is going back in the oven again later.)

2. Pour one pint of the raw blueberries into the baked pie shell.

3. Melt butter in saucepan, then add flour, lemon juice, vanilla & almond extracts, cinnamon, and sugar. Mix thoroughly. Mix in the remaining 1-1/2 pints of blueberries and bring just to a boil over medium heat. It will not look as if there will be enough liquid for these to boil, but there will be. Berries should begin to pop open.

4. Pour cooked berries over fresh berries in pie crust.

5. Cut strips or other shape (I used a couple of star cookie cutters) out of the second pie crust and lay on top of the blueberry mixture. Bake at 450 degrees for 10-12 minutes or until the top layer is done.

6. Chill pie and serve with vanilla ice cream.

Read more...

Sunday, August 9, 2009

East Side Show Room

Cross-posted to Yelp...'cause that's the way I roll.

----
Based on sheer atmospheric delight alone, East Side Show Room could easily engender a five-star rating. The space channels vintage Paris bistro with a smoldering of sexy steampunk that develops into a slow burn as the shadows lengthen.

I found myself here last night unexpectedly, after a failed attempt at the Buenos Aires Cafe down the street (two hour wait...I did not know that even existed in Austin). Thankfully, the wait at East Side Show Room was much less onerous - about 15-20 minutes - although the host told us later that this was one of the slower Saturday nights they've experienced since they opened three weeks ago.


IMG_8236*.JPG
This easy-to-miss storefront belies a much more provocative interior.

IMG_8230*.JPG
Main dining area. Over to the right, there's a small screen onto which old silent movies are projected.

IMG_8233*.JPG
Back patio.

As far as edibles and drinkables go, the folks at East Side Show Room have created a menu that is just as interesting as their space. There is a focus on fresh, locally sourced ingredients, and they are assembled innovatively and with great care. I tried a couple of the cocktails - a Zanahorita (respasado, carrot, cilantro agave, and gorgeous black Turkish salt) and a Framboise Flip (bourbon, framboise, farm egg, and peach bitters - like a fresh, summery version of egg nog). Both were utterly intriguing while still being imminently delicious - a combination that I've found can be difficult to achieve.

IMG_8241*.JPG
The Zanahorita, looking all sexy with its ring of black Turkish salt.
The respasado inside it will make you feel sexy, too.

The food menu is similarly unique, although very limited; there were only five entreé choices the evening I was there. If you're going with a picky eater, I'd suggest you preview the menu beforehand. As the menu explains, their offerings "ebb and flow with seasonal availability, whim of the chef, barkeep, and our guests' palates."

I (along with all but one other person at the table) selected East Side Show Room's version of shrimp and grits ($14). Four large Gulf shrimp were served atop curried grits made with coconut milk, lime, and mushroom, along with a side of shaved fennel. It was well-prepared and absolutely delicious; my only regret was that there was not more of it, as I found myself hungry again not long afterwards. I think the portion sizes are the only thing I might change about East Side Show Room; both the cocktails and the entrées seem a bit on the small side considering the price (perhaps this is the embodiment of Mireille Guiliano's French Women Don't Get Fat?).

IMG_8253*.JPG
Shrimp & grits, East Side Show Room style.

The table outlier ordered the special of the day, a grass-fed New York strip ($26) served with frites and a little side of fresh-tasting greens which I couldn't place but which were replete with chopped parsley. The beef had a wonderful flavor, but it wasn't quite as well-executed as the shrimp and grits; the meat was a little on the dry side, and I would have served the frites on the side, as the meat drippings rendered some of the frites a little soggy.

IMG_8251*.JPG
Shooting food in low light is the bane of my existence.

Some of the other menu items I need to try on a future outing: the lamb & goat burger (yummmm...) and the charcuterie (pork fillette, bourbon liver mousse with candy bacon, meat of the moment, pickle and house mustard). "Meat of the moment"...I love that.

IMG_8245*.JPG
This bar could have been cast in The City of Lost Children.

IMG_8249*.JPG

As much a visual feast as a literal one, East Side Show Room gracefully marries sustainability, creativity, service, and atmosphere into a unique and cohesive whole. Austin is blessed with a restaurant scene that is, in most respects, exceptional considering the size of our population. Yet even in this well-vetted landscape, East Side Show Room manages to bring something new - and undeniably compelling - to the table.

East Side Show Room
1100 East 6th Street
Austin, TX 78702
(512) 467-4380
(5/5 stars)

Read more...

Monday, August 3, 2009

Flava Tripping

I'd been hearing a lot of buzz lately about the so-called miracle berry. The miracle berry, or Synsepalum dulcificum, contains a substance called miraculin that binds to your taste buds, temporarily altering them in such a way that sour foods taste sweet (the effect lasts from between 15-60 minutes).

According to Wikipedia, the berry was first documented by French explorer Chevalier des Marchais, who, during a 1725 trip to West Africa, noticed local tribes picking the berry and chewing it before meals.

Luckily for us 21st century folk, we don't need to travel to West Africa to experience the berry's peculiar effects. In my case, Houston's very own Berry Fairy, a/k/a Jenny Wang, brought one of her Flavor Tripping parties right to my doorstep.

Upon arrival, we were each given a berry and an instruction sheet about how to eat it. Eager to try it, we dove right in.


IMG_8076.JPG
That's my berry in a baggie in the lower right hand corner of the pic.
Because all drugs come in baggies...

After a few minutes, we visited the "buffet." As one fellow tripper put it, "This is the grossest buffet ever." The offerings included lemons, limes, grapefruit, raspberries, strawberries, rhubarb, hummus, yogurt, brie, blue cheese, goat cheese, sweet hot pickles, pickled jalapenos, tomatillos, tomatoes, sour patch kids, and an assortment of condiments (sriracha, chili salt, vinegar, Tabasco).

IMG_8077.JPG
Most party-goers would turn up their noses at this buffet...but not us.

IMG_8078.JPG
My plate of "goodies"

The berry affects different people differently, and unfortunately, I think I and all of the six other people I "tripped" with were some of the unlucky ones who are less affected by the berries than most. All of us were wowed by the sour stuff, particularly the lemons, limes, and rhubarb - each of which was surprisingly delicious and sweet enough to eat plain. And the other fruits, like the grapefruit, strawberries and raspberries, were deliciously sweeter - as my friend Kimberly put it, "these taste like the best strawberries in the world" - but not really that different than they do in their normal incarnations.

IMG_8080.JPG
Walker and Erik getting their lemon on.

But the large majority of the stuff just seemed like milder versions of themselves. Goat cheese tasted like mild goat cheese; hummus tasted like mild hummus; vinegar like, well, mild vinegar. I know these berries have transformed mere goat cheese into the likes of cheesecake and vinegar to fruit soda for others, but that wasn't the case for us. I even purchased a miracle berry pill made from three berries and took that to see if it would enhance the effect, but it didn't.

Regardless, it was a fun "trip" and I'm certainly glad to have had the experience, particularly since I think miraculin has some interesting potential as a natural sugar substitute. Would I shell out $30 (and this is with a $10 off Yelp discount) to do it again? Probably not.

If you'd like to try miracle berries for yourself and don't have access to a ready-made Flavor Tripping party, pills made out of the miracle berries can be purchased online at a very reasonable price (as of the date of this post, you can purchase 10 tablets/20 servings for $14.99). The berries themselves can be purchased from The Miracle Fruit Man starting at $3.00 apiece (minimum order of 20; price goes down if you purchase in large quantity).

Have a nice trip...

Read more...

Saturday, August 1, 2009

Cupcake Smackdown!

Every once in a while, being a food blogger gives me access to some pretty wonderful opportunities that I would not have otherwise had. One of those manifested for me today, when I got to be a judge for Austin's first Cupcake Smackdown! The Smackdown, organized by the tireless Jennie Chen, featured blind taste competitions in storefront, catering, and amateur categories; a "cutest cupcake" contest; and cupcake-eating contests for both humans and dogs.


Picture 1

I got there a little early and got to peek behind the scenes a bit at the veritable hive of cupcake activity. There were more cupcakes than I'd ever seen before in one place. Cupcakes...EVERYWHERE!

IMG_8102.JPG

IMG_8136cr.jpg

Before too long, there were people and dogs everywhere, too. This event got a TON of buzz, and it seemed as if all of Austin came out to join the fun.

Frm Dawn1.png
Photo by Dawn Mitchell

Frm Dawn2.png
Vendors were on hand to ensure that nobody went cupcake-less.
Photo by Dawn Mitchell

IMG_8132.JPG


Soon, the much-anticipated judging began. I was one of five judges sampling cupcakes submitted by caterers. We judged seven cupcakes in each of three different categories - vanilla, chocolate, and baker's choice - for a total of twenty-one cupcakes.

IMG_8126cr.jpg
A table full of tastings

I have to admit, the judging was much more difficult than I expected. We rated each cupcake on texture and taste for both cake and frosting separately, then gave a fifth rating for the cupcake overall. For me to judge the cakes that way, that meant I took at least three bites from each of twenty-one cupcakes - usually more, as I often had to go back and re-sample them to better enable me to compare cupcakes to one another. I'm here to tell you, that's a lot of cupcake eatin'...but somehow, somehow, I muddled through.

Cupcake Smackdown 1.0
Yours truly, discussing the finer points of judging
with Kristin Owen from Do512.
Photo by Jack Newton

IMG_8127*.JPG
Marshall Wright of EatThisLens, doing the dirty work.

By the time we were finished, I was, well, finished. Eating cupcakes, that is. I couldn't even think about eating another bite. But I wasn't too spent to wander around and snap some photos of the pretty little things.

IMG_8118*.JPG
These beauts were from Wicked Cakes.

IMG_8115*.JPG
These crazy creations from Cowgirl Cupcakes featured a french toast cupcake with candied bacon on top.
Yes, bacon.

IMG_8153*.JPG
I'm not sure what flavor this one was, but it sure was cute!

I hung around for a while longer and watched half of the cupcake pupcake eating contest for dogs, too. In this portion of the event, the dogs were timed to see how quickly they could eat three cupcakes. Most of the pups took between 40 seconds to two minutes to eat theirs, but this champion scarfed his down in eleven seconds and kept looking for more.

IMG_8162*.JPG
And I thought I was an enthusiastic eater...

What a wonderful way to celebrate these totally tasty treats. Huge kudos to Jennie for pulling off a first class event!

Now if you'll excuse me, I'm going to go slip off into a diabetic coma. Till next year!
----
Updated 8/2/09 - For those of you who are eager to taste the best cupcakes in Austin, Jennie's blog has been updated with the list of winners.

Read more...

More Foodie Is The New Forty

Proud to be a member of the AFBA!

Search Foodie Is The New Forty

Recent Posts

  © Free Blogger Templates Photoblog III by Ourblogtemplates.com 2008

Back to TOP